

A broken foot changes everything — at least temporarily. Suddenly, the walk from the bedroom to the kitchen feels like an expedition, and simple tasks you never thought twice about require a plan. If your doctor has recommended keeping weight off your foot while it heals, a knee scooter can be the difference between feeling stranded and feeling like yourself again.
More and more people recovering from foot fractures, stress injuries, and post-surgical procedures are choosing knee scooters over traditional crutches — and physical therapists often recommend them for good reason. They're easier on the upper body, more stable for most users, and give you back a level of independence that crutches simply can't match. But getting started can feel unfamiliar, even a little intimidating.
This guide walks you through everything you need to know about using a knee scooter for a broken foot: how to set it up properly, what your first days will feel like, how to handle everyday challenges, and how to stay safe as you move through your home. Whether you're the one recovering or a family member helping someone you love, you'll find clear, practical answers here — no medical jargon required.
What Is a Knee Scooter and Why It Helps After a Broken Foot
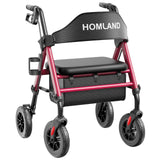
A knee scooter — sometimes called a knee walker — is a wheeled mobility device designed to support your injured leg while you propel yourself forward with your uninjured leg. Instead of bearing weight on your broken foot, you rest your knee and lower shin on a padded platform, keeping the foot elevated and protected while you move around freely. It's a genuinely practical solution that lets you get around your home, run short errands, and engage in daily routines without putting stress on the healing bone.
The appeal compared to crutches is real. Crutches require significant upper-body strength, can cause underarm soreness and wrist strain, and demand a level of coordination that many people — especially older adults or those recovering from surgery — find exhausting. A knee scooter distributes effort more naturally, keeps both hands available for tasks like carrying a cup of coffee or opening a door, and reduces the risk of losing balance. Physical therapists often recommend knee scooters for non-weight-bearing recovery precisely because they allow patients to stay active without overexerting themselves.
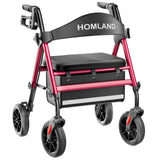
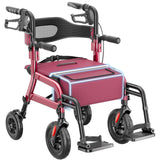
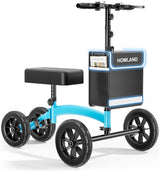
If you or someone you love is navigating a broken foot recovery, exploring the HOMLAND knee scooter collection is a great starting point. HOMLAND's knee scooters are FSA/HSA eligible, backed by a 1-year manufacturer warranty plus a 1-year extended warranty, and ship from a US local warehouse — so you're not waiting weeks to get moving again.
Setting Up Your Knee Scooter Correctly
One of the most important things you can do for a comfortable, safe recovery is to set up your knee scooter properly before you take a single step. A poorly adjusted scooter can lead to knee discomfort, poor posture, and unnecessary strain — problems that are completely avoidable with a few minutes of setup.
Adjusting the Knee Platform Height
The knee platform should sit at a height that allows your injured knee to rest comfortably while keeping your hip level. When you kneel on the pad, your thigh should be roughly parallel to the ground — not angling sharply upward or dropping toward the floor. If the platform is too low, you'll hunch forward and strain your back. Too high, and you'll feel unstable and off-balance. Most knee scooters allow tool-free height adjustment, so take your time here and test a few positions before committing.
Setting the Handlebar Height
Stand upright next to the scooter and adjust the handlebars so they reach roughly hip or waist height. Your elbows should have a slight, relaxed bend when you grip the handles — not fully extended, and not pulled up to your chest. This position protects your shoulders and wrists over long periods of use, and it gives you the best control over steering and braking. Physical therapists often describe this as the "natural handshake" position: arms relaxed, grip light but secure.
Checking the Knee Pad Cushioning
Your knee will spend a lot of time on that pad, so comfort matters more than it might seem at first. The pad should feel supportive without being hard or creating pressure points. If your scooter's pad feels insufficient after a day or two of use, an aftermarket gel pad cover can make a meaningful difference. Some people also find that wearing a soft knee sleeve adds a layer of cushioning and warmth during longer periods of use.
Your First Few Days at Home: What to Expect
The first 48 to 72 hours on a knee scooter are an adjustment period, and that's completely normal. You'll likely feel a little awkward at first — turning corners takes more space than you expect, narrow hallways require patience, and your standing leg may tire faster than usual since it's doing more work than before. Give yourself grace during this window. Most people find that their confidence and efficiency improve significantly after just a few days of practice.
Expect your non-injured leg to feel fatigued by the end of the first day or two, especially if you're used to being on your feet. This is your body adapting to an unfamiliar movement pattern. Short rest breaks throughout the day help enormously. If you have a comfortable chair in a central room of the house, make it your base of operations — somewhere you can sit, rest your leg, and regroup before your next task.
You may also notice that the scooter feels different on various floor surfaces. Carpet provides more resistance and requires a bit more effort to push through. Hardwood or tile floors feel smoother and faster. Transitions between surfaces — like rolling from carpet onto a kitchen tile floor — can cause a small jolt if you're moving quickly. Taking those transitions slowly until you're comfortable is one of the simplest ways to avoid an early stumble.
Navigating Daily Life on a Knee Scooter
Once you've got the basics down, the real work begins: fitting the knee scooter into your actual daily routines. The good news is that most people adapt faster than they anticipate, and the scooter quickly starts to feel less like a limitation and more like a tool that gives them their life back.
In the kitchen: The height of most kitchen counters is actually well-suited to knee scooter users. You can prep food, fill a glass of water, or make coffee without needing to bend awkwardly. A small basket or bag attached to the handlebar makes it easy to carry items from room to room without balancing things in one hand.
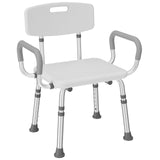
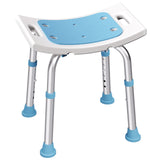
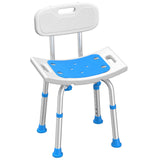
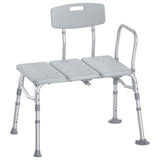
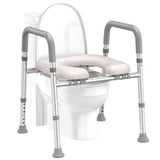
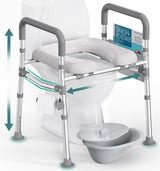
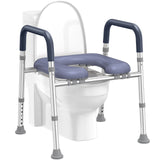
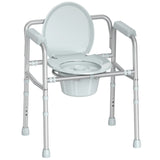
In the bathroom: This is where extra preparation pays off. Getting in and out of a shower or bathtub requires careful planning when you're non-weight-bearing. Many people find that pairing their knee scooter recovery with a shower chair significantly reduces the risk of slipping and makes bathing far more manageable. You can explore HOMLAND's shower chair collection for options designed with exactly this kind of recovery in mind.
Outdoors and errands: Smooth, paved surfaces work well for knee scooters. Cracked sidewalks, gravel, grass, and uneven terrain are trickier and worth approaching with caution. Many knee scooters are designed primarily for indoor and smooth outdoor use, so save rough terrain for when you're more confident — or have someone with you.
Common Challenges and How to Adjust
Even after you've settled into a rhythm, certain situations will still require a bit of problem-solving. Here are the most common challenges people encounter during knee scooter recovery — and practical ways to work through them.
- Knee discomfort on the pad: If your knee feels sore after extended use, check that the pad height is correct and consider adding a gel cushion. Also take regular breaks to stand briefly on your good leg and give your knee a rest from the pressure.
- Tight spaces and doorways: Standard knee scooters need more turning radius than you might expect. In narrow hallways or small bathrooms, practice a three-point turn rather than trying to spin in place. Rearranging furniture slightly during your recovery period can also make a real difference.
- Fatigue in the standing leg: Your good leg is carrying more load than usual. Supportive footwear with cushioning helps, and so does being intentional about where you walk — planning your routes through the house to minimize unnecessary trips.
- Stairs: Knee scooters are not designed for stairs. For multi-story homes, it's worth designating a single floor for your main activities during recovery, or working with a physical therapist on safe stair-navigation techniques using a railing and a crutch.
- Sitting down and standing up: Position the scooter close to your chair or bed before you transfer. Engage the handbrake (if your model has one), steady yourself, then lower yourself slowly. Reverse the process to stand. Having a bed rail or grab bar nearby can make this significantly easier and safer — HOMLAND's bed rails collection includes options designed for exactly this kind of home recovery scenario.
Staying Safe on a Knee Scooter at Home
Safety during a broken foot recovery isn't about fear — it's about setting yourself up to heal without setbacks. A few thoughtful habits go a long way toward keeping you upright and on track.
Clear your pathways. Rugs, cords, pet toys, and clutter on the floor are the most common hazards for knee scooter users. Do a walk-through of your home before your first day and remove or secure anything that could catch a wheel. Good lighting in hallways and bathrooms matters too — especially if you're getting up at night.
Always use the brake when you stop, even briefly. It takes only a moment for a scooter without a locked brake to roll away when you shift your weight. Making the brake a reflex early in your recovery prevents a lot of near-misses. When you're sitting, position the scooter where it won't be in your way but is still within easy reach when you're ready to move again.
Avoid rushing. The biggest safety risk on a knee scooter isn't the device itself — it's moving faster than your confidence actually supports. Take corners slowly, approach transitions between floor surfaces at a reduced speed, and resist the urge to push your pace just because you're feeling better. Recovery goes best when you protect the progress you've already made.
Choosing the Right Knee Scooter for Your Recovery
Not all knee scooters are the same, and choosing the right one for your body and home environment makes a meaningful difference in how comfortable your recovery feels. A few key factors are worth thinking through before you purchase.
Weight capacity: Make sure the scooter is rated to safely support your body weight. HOMLAND's knee scooters are built with heavy-duty load capacities so users can rely on them fully — no compromising your confidence just to save a few dollars on a lighter-duty model.
Wheel size and type: Larger wheels handle uneven surfaces better and tend to roll more smoothly on carpet. If most of your movement will be indoors, standard wheels work well. If you anticipate some outdoor use, look for a model with slightly larger, more robust wheels.
Turning radius: If your home has narrow hallways or small rooms, a steerable knee scooter with a tighter turning radius will make daily navigation much less frustrating than a fixed-frame model.
Pad adjustability and handlebar height range: Both the knee pad and handlebars should adjust across a range that suits your height. Taller users especially benefit from a generous adjustment range to avoid the back strain that comes from a too-low setup.
HOMLAND's knee scooter collection is authorized by licensed Doctors of Physical Therapy and designed with all of these factors in mind. Every model features tool-free assembly, adjustable heights, and home-friendly engineering — exactly what you need when you want to recover comfortably without turning your home into a medical facility. And because they're FSA/HSA eligible, you may be able to use pre-tax dollars toward your purchase.
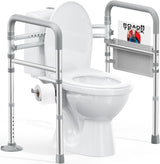
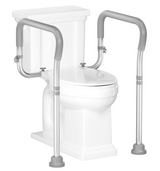
If you're also thinking about safety elsewhere in the home during your recovery — a toilet safety rail to make bathroom trips easier, or a toilet safety rail for added stability — HOMLAND's full range of home-care products are designed to work together, giving you (and your family) confidence at every point in the house.
Getting Back to Everyday Life, One Day at a Time
A broken foot is a temporary setback — and the right equipment makes it feel a lot less like one. A well-fitted knee scooter, set up correctly from day one, gives you back the freedom to move through your home on your own terms: making your own meals, getting to the bathroom safely, and staying connected to the rhythms of everyday life while your foot heals.
The adjustment period is real, but it's short. Most people feel meaningfully more comfortable and confident within a week of starting. The key is to take setup seriously, plan your home environment thoughtfully, and give yourself permission to go slowly at first. Your recovery will thank you for it.
If you're caring for someone going through this process, the best thing you can do is help them set up their environment before they come home and check in on the adjustment without hovering. Independence and dignity matter during recovery just as much as safety does — and a good knee scooter supports all three.
Ready to Move Through Recovery with Confidence?
Explore HOMLAND's knee scooter collection — designed with input from licensed physical therapists and built for real home recovery, not a hospital hallway. FSA/HSA eligible, backed by a 2-year total warranty, and shipped fast from our US local warehouse.
Have questions about which model is right for your situation? Contact us — our team is here to help you find the right fit for your recovery and your home.
You can also browse our full product lineup to discover other home safety and mobility tools that support independent living at every stage of recovery.