

There's a moment many people recognize — a hesitation at the top of the stairs, a hand reaching instinctively for a countertop, a slight wobble getting up from a chair. A walking cane can be the simple, dignified answer that turns those moments of uncertainty back into moments of confidence. Whether you're recovering from a knee replacement, managing a chronic balance issue, or simply looking for a little extra stability on longer walks, a cane gives you support exactly where you need it without slowing you down.
The good news is that choosing and using a cane correctly is straightforward — but the details do matter. The wrong height, the wrong type, or the wrong technique can actually increase the risk of a fall rather than reduce it. This guide covers everything you need to know: the different types of walking canes available, how to find the right fit, which hand to use, and how to move safely on flat ground, stairs, and uneven surfaces. Physical therapists consistently point to these basics as the foundation of safe, confident walking — so let's walk through them together.
Why a Walking Cane Might Be the Right Next Step
A walking cane isn't a sign that independence is slipping away — it's a tool that protects it. Physical therapists often recommend canes for people dealing with mild to moderate balance challenges, joint pain, post-surgical recovery, or neurological conditions that affect gait. By widening your base of support and shifting a portion of your body weight through your arm, a cane reduces the load on a painful hip or knee and gives your nervous system an extra point of contact with the ground, which measurably improves balance and coordination.
For adult children who are concerned about a parent's safety at home, introducing a cane early — before a fall occurs — can be one of the most proactive steps a family takes. Paired with other home safety measures like grab bars and a stable standard walker for more demanding days, a cane becomes part of a broader strategy for staying safe and self-reliant at home.
Types of Walking Canes
Not all canes are built the same, and matching the right style to your specific needs makes a real difference in both comfort and safety. Here's a breakdown of the most common types:
Standard Single-Point Cane: The classic design — a single rubber-tipped shaft with a curved or ergonomic handle. Lightweight and easy to maneuver, this is the right choice for people who need mild support and have reasonably good upper-body strength. It's ideal for arthritis, mild joint pain, or general balance support on familiar terrain.
Quad Cane (Four-Point Cane): This style has four small feet at the base instead of one tip, creating a wider, more stable footprint. Quad canes can even stand on their own when you set them down, which is a genuinely useful feature if you need both hands free momentarily. Physical therapists often recommend quad canes for people recovering from a stroke, those with significant one-sided weakness, or anyone who needs a higher level of support than a single-point cane provides. The trade-off is that they're slightly heavier and require a particular gait rhythm to use comfortably.
Folding Cane: Functionally similar to a standard single-point cane, but designed to collapse into a compact size for travel or storage in a bag. Great for active users who don't need the cane constantly but want it available when fatigue or unfamiliar terrain strikes.
Offset Handle Cane: The shaft on this style is offset slightly forward of the handle, which distributes your weight more directly over the cane's tip. This design reduces wrist fatigue and makes it easier to bear weight comfortably over longer distances — a thoughtful choice for anyone dealing with wrist, hand, or shoulder discomfort.
Seat Cane: A hybrid tool with a small fold-out seat built into the handle area, allowing users to sit briefly when tired. These are best suited for outings — shopping trips, outdoor events — rather than everyday in-home use, where a dedicated rolling walker with a seat often provides more comfort and stability.
How to Size a Walking Cane Correctly
Cane height is one of the most important — and most frequently overlooked — factors in safe cane use. A cane that's too tall forces your elbow into an awkward raised position, straining your shoulder and throwing off your posture. A cane that's too short makes you hunch, putting stress on your lower back and reducing the support the cane actually provides. Physical therapists use a simple, reliable method to find the right height:
- Stand in your everyday shoes – The shoes you normally wear add height, so always measure while wearing them.
- Let your arms hang naturally at your sides – Relax your shoulders and stand up straight.
- Measure from the floor to your wrist crease – The top of the cane handle should align with the crease on the inside of your wrist (also described as the level of your hip bone for a quick approximation).
- Check your elbow bend – When you hold the cane handle with the tip on the floor beside you, your elbow should be bent at approximately 15 to 20 degrees. This slight bend is the sweet spot — enough to absorb impact, not so much that your arm is working overtime.
Most adjustable canes can be sized between roughly 28 and 38 inches, which covers the majority of adult heights. If you're taller than about 6'4" or shorter than 5'0", look specifically for canes marketed as tall or petite, or consult with a physical therapist for a precise fitting.
Which Hand Should You Hold the Cane In?
This surprises many first-time cane users: you hold the cane on the opposite side from your weaker or injured leg. So if your left knee is the problem, the cane goes in your right hand. The reason is biomechanical — when you step forward with your left foot, you naturally swing your right arm forward as well. Holding the cane in your right hand means it moves forward in sync with your affected leg, offloading weight at precisely the right moment in your stride. Using the cane on the same side as the injured leg actually disrupts your natural gait pattern and provides less effective support.
The one exception is when a physical therapist or physician specifically advises otherwise based on your particular condition — always defer to personalized guidance from your care team when it differs from general recommendations.
How to Use a Walking Cane Safely, Step by Step
Once your cane is sized and you know which hand to hold it in, the walking technique itself is straightforward. The goal is a smooth, three-point gait that keeps you stable without disrupting your natural rhythm.
- Start position – Stand upright, holding the cane on your stronger side, with the tip approximately 2 to 4 inches out to the side of your foot and slightly forward.
- Move the cane forward – Advance the cane at the same time as your weaker leg steps forward. The cane and the affected leg move as a pair.
- Step through with the stronger leg – Your stronger leg steps forward past the cane, completing the stride.
- Repeat with a steady pace – Maintain an even tempo. Avoid rushing; the stability the cane provides depends on planting the tip firmly before committing your weight.
It can feel awkward at first — most people need a few days of practice before the rhythm feels natural. If possible, practice in a hallway at home where a wall is close for additional reassurance while you build confidence.
Navigating Stairs and Curbs with a Cane
Stairs are where many falls happen, so it's worth taking extra care to learn the right technique. Physical therapists use a helpful memory device: "Up with the good, down with the bad."
Going up stairs: Lead with your stronger (unaffected) leg, then bring the cane and your weaker leg up to the same step. Use the handrail if one is available — hold the rail with one hand and the cane with the other, or transfer the cane to the same hand as the rail so the other hand is free.
Going down stairs: Lead with the cane and your weaker leg together, then step down with your stronger leg. Coming down is generally the more challenging direction, so take it slowly and always use the handrail when possible.
Curbs: Treat curb cuts and single steps the same way — up with the stronger leg, down with the cane and weaker leg first.
Common Mistakes to Avoid
Even well-intentioned cane users can develop habits that reduce safety over time. Here are the most common ones to watch for:
- Using a cane that's the wrong height — Too high or too low throws off your posture and reduces the support the cane can provide. Resize if your footwear changes significantly.
- Holding the cane on the wrong side — As discussed above, the cane belongs in the hand opposite your weaker leg for optimal weight transfer.
- Planting the tip too far forward — Reaching too far ahead with the cane creates an unstable lever. Keep the tip within a natural, comfortable stride length.
- Ignoring a worn rubber tip — The rubber tip on your cane is what prevents it from sliding on hard floors. Check it regularly and replace it when it shows significant wear. Replacement tips are inexpensive and widely available.
- Leaning heavily on the cane — A cane is a balance aid, not a full weight-bearing support. If you find yourself needing to lean heavily, it may be time to consider a walker for greater stability.
When a Cane Isn't Enough: Knowing When to Upgrade
A cane is ideal for mild to moderate support needs, but there are situations where a different mobility aid makes more sense. If you find yourself frequently reaching for walls or furniture for extra support, experiencing fatigue in your arms from leaning on the cane, or recovering from a significant surgery like a hip or knee replacement in the early weeks, a standard walker or a rolling walker provides a broader, more stable base that can make daily movement feel significantly easier and safer.
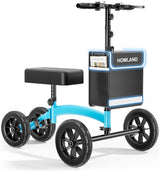
For post-surgery situations involving the lower leg or foot — like a broken ankle — a knee scooter can be a more comfortable and practical alternative to crutches or a cane, allowing you to move freely without putting any weight on the affected limb. A physical therapist can help you assess which tool is the right match for where you are in your recovery.
For caregivers: if your loved one seems hesitant to use their cane consistently, or if you notice they're still holding onto furniture even with the cane in hand, that's a signal worth discussing with their doctor or physical therapist. The right level of support makes independence feel achievable, not effortful. You might also explore complementary safety additions for the home — a bed rail for safer transfers in the morning, or a shower chair to reduce fall risk in the bathroom, where slippery surfaces are a real concern.
Staying Independent, One Step at a Time
A walking cane, sized correctly and used with the right technique, is one of the simplest and most effective ways to stay active, confident, and safe at home. The key details — the right type for your needs, the correct height, the proper hand, and a consistent three-point gait — make the difference between a tool that truly helps and one that goes unused in a corner. Physical therapists consistently emphasize that getting these basics right from the start builds the kind of confidence that carries people through recovery and into everyday life.
At HOMLAND, we believe that staying safe at home shouldn't mean your home starts feeling like somewhere else. Whether you're stepping down from a walker, managing long-term balance challenges, or helping a parent move more safely, the right support makes daily life feel like daily life again — on your terms, in your own space. Browse our full range of home mobility products, all FSA/HSA eligible, backed by a 1-year manufacturer warranty plus 1-year extended warranty, and shipped fast from our US local warehouse.
Have questions about which mobility aid is right for you or your loved one?
Our team is here to help you find the right fit — no pressure, no jargon, just honest guidance. Contact us today and let's find the solution that works for your life at home.